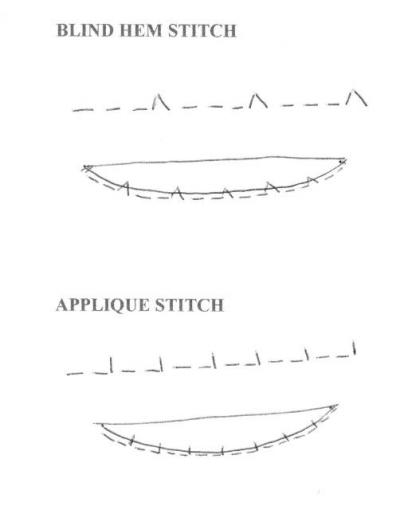
Several machine stitch patterns can be used to applique an edge - if the stitching is small enough then the finished appearance is like the effect of small hand sewing!

The sewing machine needs to be set at certain sizes for the stitch length and width.
‘BLIND HEM’ STITCH
This stitch is frequently used for securing the edge of a design or shape and when employed carefully gives the appearance of very neat hand stitching. Everyone is amazed at your ‘hand sewing skills’ yet it was machined - it’s a fake!
The best Blind Hem stitch pattern consists of a bite (indent) with 4/5 straight stitches in between.
Many machines do this particular stitch but some machines have a variation that would suffice.
Set the machine: stitch width 1 - stitch length 1.
For current Husqvarna Viking machines try stitch width 1.5 - stitch length 0.4. Designer 1 & 2 owners: stitch width 1 - stitch length 0.3.
Some of the later Pfaff models appear to reduce the stitch width to 2 only. Try this trick: Press twin needle button; when activated (light on) the stitch width is reduced by 2. Consequently if you set stitch width at 3, press twin needle setting button - the stitch width will be 1. (A good technique for reducing the width of many patterns butdoesn’t apply to all Pfaff models.)
The LCD display on some makes of machine shows the correct settings (1 stitch width and length) but in reality the stitch is wider. These particular models cannot reduce the stitch width below a certain measurement due to some special internal override.
Having adjusted the stitch to the desired setting, carefully sew round the edge of the rolled fold. Keep the straight stitching very close to the outside of the fold and just catch the edge of the fold with the fine ‘bite’ (indent). (See picture above)
Practise first! An ‘open-toed’ presser foot gives a clearer view of the edge of the fold than the regular presser foot.Open-toed feet for most models are available from your dealer.
Alternatively, create one by snapping the central bar out of the Perspex appliqué foot. Do not use the designated Blind Hem foot (if one is supplied) - you are not making a blind hem but using the stitch as a method of appliqué.
Invisible or nylon filament is ideal although a thread well matched to the appliquéd fabric will suffice. The top tension on the machine should be reduced (lower number) when using nylon filament. Fill the bottom bobbin with cotton thread (for preference) not nylon.
APPLIQUE STITCH
This is a pattern (sometimes called the 'pin' stitch) consisting of two or more straight stitches then a stitch to the side and staight back - no bite - just there and back in same place.
The pattern can be found on many Janomes, Borthers, Pfaffs, Husqvarnas and some Elnas but not on any Bernina. (Bernina's have a Blanket stitch that is not quite the same as it is one stitch in between each stitch to the side - it can be used but in my opinion the gap between the side stitches is too small.
The settings for this stitch is normally:
stitch width 1: stitch length 1 or 2.5/3.0
The length varies according to the model. For Husqvarna SE owners try setting the length at 4 - look at the screen to see the size of the stitch pattern.
